Diving into Depth Measurement: Arduino Water Depth Project
I wanted to share my recent experience building a water depth measurement system as an Arduino project. It's been quite the ride, I assure you, full with obstacles, learning curves, and triumphant moments. Now put on your coding cap and let's get started!
Comprehending the Idea:
Understanding the concept behind our project is crucial before getting into the specifics of code and circuits. In essence, we're utilizing Arduino to develop a water depth measurement device. The objective is to create a gadget that can use ultrasonic sensors to measure water depth correctly and provide the findings in an easy-to-read manner.
The necessary equipment:
Arduino Uno: this is the brains behind our business, serves as the microcontroller, processing orders and data.
Resistors, Breadboard, and Jumper Wires: These components will help us build and connect our circuit efficiently.
Power Source: A USB connection to the computer system is needed to keep our Arduino running.
LED Lights: Red and green LED lights were used to give the output
Water Level Sensor: This sensor detects the water level and sends corresponding signals to the Arduino.
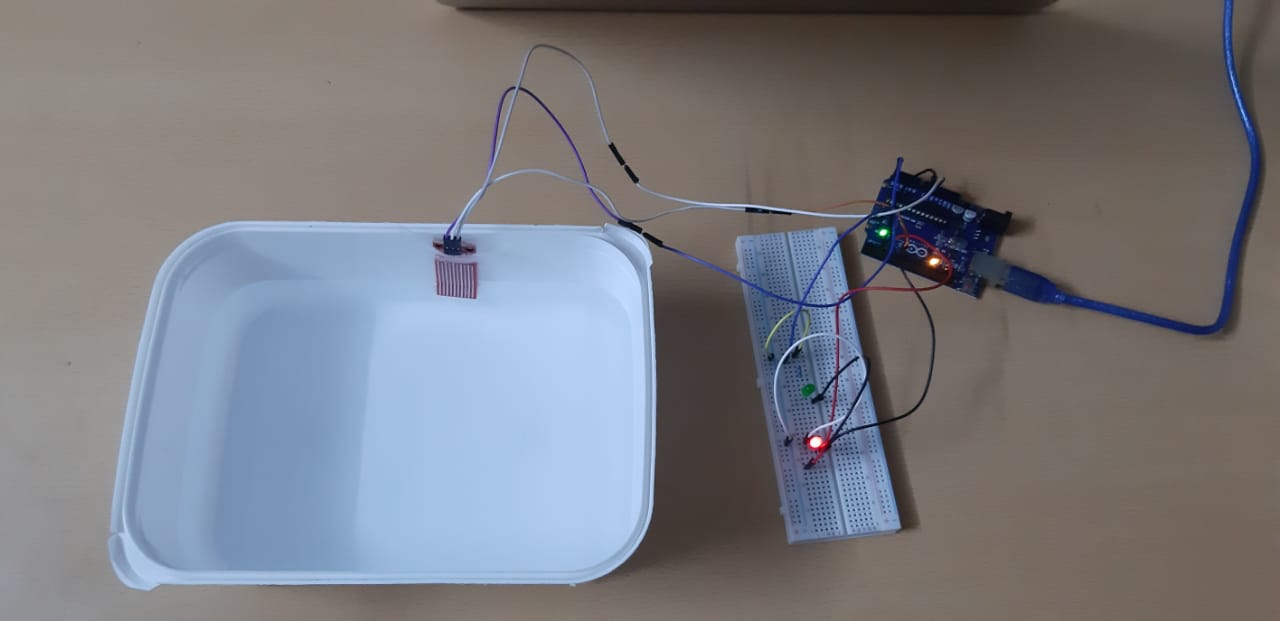
Constructing the Circuit:
Now that we have our parts, let's get our hands dirty and build the circuit. Using a breadboard and jumper wires, we'll connect the Arduino Uno to the water level sensor and LED. The LED will be tied to a digital pin via a resistor to control current flow, and the output of the water level sensor will be connected to one of the analogue pins on the Arduino

Encoding the Reasoning:
Finally, we reach the core of our project: the code. We'll develop a programme in the Arduino IDE that reads data from the water level sensor, decodes it, and modifies the LED's brightness as necessary. We'll put logic into practice to translate sensor data into LED intensity levels so that the water depth may be seen visually.
Examining and Adjusting:
Now that our circuit and code are all up, it's time for the crucial step: testing! We'll submerge our apparatus in a water-filled container and watch how the LED responds to variations in the water's level. We can fine-tune our system throughout this phase to ensure precise and responsive measurements.


Celebrating success:
With extensive testing and improvement, our Arduino water depth sensor is a resounding success! An aesthetically pleasing method of measuring depths is offered by the LED, which brilliantly lights to mirror the water level. We encourage others to investigate creative methods to IT projects by sharing our accomplishment with mentors and colleagues.


Below is a YouTube video we compiled that explains how the system works.
In summary:
It has been illuminating to start this Arduino water depth experiment. We've shown that, even as first-year IT students, we can push the limits of traditional projects by embracing originality and innovation. There are no limits to what we can accomplish in the field of technology when we use Arduino as our tool and our imagination as our guide.

Comments
Post a Comment